Ceiling and wall mouldings. How to install? Trim Carpenter advise.
Before choosing wall and ceiling decoration details, you need to think carefully about where they will be installed, what kind of ornament and how many wall and ceiling mouldings you will need. After purchasing decorative elements and deciding to install them yourself, work according to the instructions of professional craftsmen presented in this article.
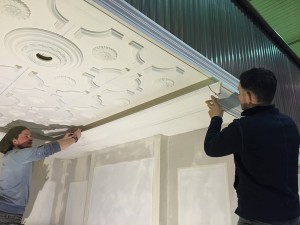
1. To make the work go more smoothly, invite an assistant. It will be easier to do all the installation work with two people: measure, attach evenly, press, etc. We advice to do instalation work by two people.
It is best to glue the mouldings in pairs.
2. Prepare the necessary tools: You will need glue for installation, glue for joints, acrylic, putty, nails, sandpaper, and a cutting machine.
3. Sand the walls on which the wall strips and ceiling trim will soon be installed. The walls must be perfectly clean, dry, dust-free, and covered with a primer.
4. When cutting the moulding, pay attention to the accuracy of the joining lines and corner cuts, measure the inner and outer corners very carefully and cut them carefully. Priming and marking the ceiling moulding at the bottom edge. Cutting the corner of the ceiling moulding with an adjustable angle saw.
Fitting and marking of the bottom edge of the moulding.

Cutting the corners of mouldings with an adjustable angle cutting machine.
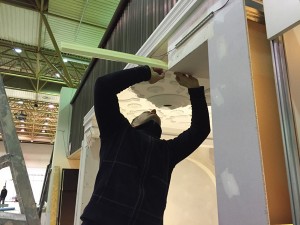
5. Having the required length, the ceiling and wall mouldings are glued to the prepared walls. Apply a thin layer of glue to the joints to avoid visible excess glue. Ceiling wall gluing.

Gluing of coving moulding..
6. After gluing the coving moulding, it is recommended to drive a long thin nail under the lower edge of the wall strip or ceiling strip every 50 centimeters. If the strip height is more than 12 centimeters, drill it. All this is done to hold the strip from possible slipping until the glue dries completely and hardens. Remove carefully the nails, and if you drilled, fill in the drilled areas the next day. Additionally drill wide ceiling strips every 50 cm. Carefully drill wide ceiling strips at the corners, making sure that the joint seam does not align.

Additionally screw wide coving moulding.
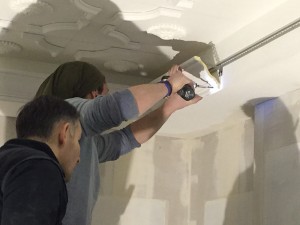
Screw in wide coving mouldings every 50 cm.

Carefully screw the wide ceiling mouldins to the corners, making sure that the joint seam does not shift.
Other news

High ceilings
High ceilings are one of the biggest advantages of a room. First of all, they create a feeling of space that makes it easier to breathe, and secondly, they allow for much richer decoration of the walls and the ceiling itself.
ViewWhen should ceiling and wall mouldings, skirting boards be glued? Trim Carpenter advise
One of the most challenging and enjoyable tasks is ensuring the comfort of your surroundings.
View

When is it worth choosing ceiling rosettes?
Ceiling decoration is becoming increasingly popular: it is chosen by both those who create a more expressive, detailed interior, and those who love a subtle, minimalist interior.
ViewHow to install concealed LED lighting using coving mouldings
To install concealed LED lighting, the ceiling trim strip should be glued only to the wall with its lower edge.
View

Installation Process of Ceiling Mouldings – Video Guide
When installing ceiling strips, it is especially important to measure and cut the corners as accurately as possible, because the greater the accuracy of the cutting, the smaller the seam between the connecting strips and, at the same time, less work is required to fill the joints.
View
